Introduction
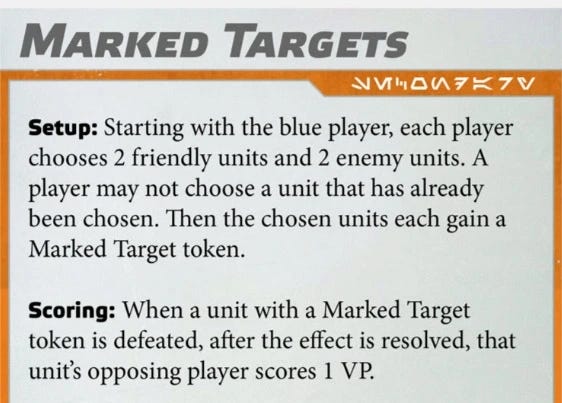
Marked Targets involves selecting units that, when defeated, give victory points. Each player marks two of their own units and two of their opponent’s units for this objective. When a marked target is defeated, the enemy player scores 1 Victory Point.
The important thing to know about this secondary is that you’ll end up with 4 of your units marked, 2 of which you choose, and 2 of which your opponent chooses. Your opponent will be in the same situation, with 4 marked units in their army. Your ultimate goal is to collect as many enemy marks as possible while keeping your marks safe.
This secondary is slightly more difficult for the Blue Player, since Blue will have more units to choose; you have more information as the Red Player. Sometimes I find myself in a situation where I am thinking about marking something that my opponent was already thinking about marking. I end up surprised by my opponent’s choice of marked target as Blue because I think it’s a mistake. You don’t get this opportunity as the Blue player.
You might want to avoid this secondary if you see there are units in your army that are easily destroyed by the enemy army, like if you have a lot of B2s and your opponent has easy access to piercing attacks, or if you have a big armored unit and your opponent comes to the table with triple Laser Cannon AT-RTs. This could result in a difficult situation where a relatively front-line unit gets swept away quickly and gives up a VP. It may not be as straightforward as “this unit will give up a VP,” but having the mark forces you to weigh the risks of being bold with that unit.
Marked Targets is a fun secondary for me because it can enable a claw-back mechanic if you start to fall behind on Primary. The last game I played with this secondary was with Recover the Research, and I had deployed too conservatively to score 4 labs, but I knew if I was aggressive about claiming marked targets, I could grab more victory points than my opponent. I managed to pick up two marks in one round and moved ahead in VP despite being behind on Labs. The game ended 13-12, and without claiming those marks I would have lost.
How to Pick Marks
When assigning marks, I tend to think about which units in my army and in the enemy army will be “front-line” and “back-line.” Front-line units are played forward and will be easier to attack and be attacked. You know your opponent is going to run them into the fight. Your enemy is likely looking for the same things in their army. Those front-line units are already being put at risk, and potentially giving up a VP makes the risk even greater.
In contrast, back-line units are much harder to reach. and sometimes don’t even need to play the game to help us win on this objective. This would be something like a naked squad sitting behind a line of sight blocker - it’s already contributing to the game by preventing the enemy from scoring its mark. You can also mark a target that’s both back-line and takes a commitment to kill, like an AAT or a Saber Tank.
Force users are a unique case. Putting marks on a force user can be a risky proposition. Force users can feel immortal with Deflect being on all the time while being shot at, and some of them have great dodge generation to boot. However, if you have a plan to kill your opponent’s force user, whether that’s a Force Push after it’s activated, or just swarming it with other powerful melee units, then by all means mark that force user. It’s tough for me to flat out recommend marking force users though, because if you end up behind in activations, it’s highly unlikely your opponent will, if they play tightly, ever put their force user in a position to be killed in the first place.
Strategic Summary
The essence of Marked Targets is managing risk - how much value can you get out of a marked unit without giving up a victory point?
This secondary appears straightforward at first, but a word of caution - if you attack a marked target and its unit leader escapes behind a line of sight blocker, it’s wasted effort. When you commit to going after a mark, make sure you have enough attacks on the board to take it down before it can escape. This is why it’s good to mark units in your own army that are high health, and generally stand in the back. Even better if they can contest an objective while being behind a line of sight blocker.
What have your experiences with this secondary been like? Leave a comment below.


